
What is Allure and what is it used for
Allure is an open-source framework that is designed to create beautiful, interactive, and easy-to-read reports for automated tests. It allows developers and testers to create detailed and meaningful reports of their test results and can be integrated with various test frameworks such as JUnit, TestNG, and more.
Why Allure specifically?
Allure is a popular choice among developers and testers for creating test reports because of its ease of use and flexibility. The framework is highly customizable and allows developers to create reports that are tailored to their specific needs. Additionally, Allure provides a wide range of features, including the ability to create detailed test suites, the ability to include screenshots, and the ability to add custom data to the report.
In this article we will see how to install Allure to your project, how to generate reports and how to use annotations to give your reports more meaning. I will demonstrate allure's capabilities on a small Selenium UI auto testing project.
Installation
Gradle
In order to use Allure with Gradle in your project you will need to add several dependencies to projects' build.gradle file:
- testImplementation group: 'org.aspectj', name: 'aspectjweaver', version: '{needed version}'
- testImplementation group: 'io.qameta.allure', name: 'allure-java-commons', version: '{needed version}'
- testImplementation group: 'io.qameta.allure', name: 'allure-junit5', version: '{needed version}'
- testImplementation group: 'io.qameta.allure', name: 'allure-commandline', version: '{needed version}'
- testImplementation group: 'io.qameta.allure', name: 'allure-assertj', version: '{needed version}'
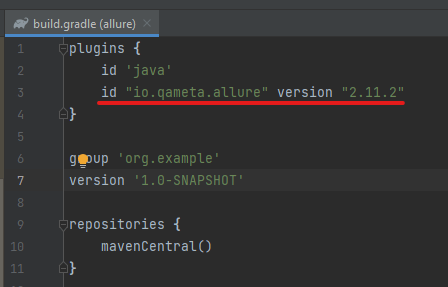
You are going to need to add Allure plugin into plugins section of your build.gradle file as well:
- id "io.qameta.allure" version "{needed version}"
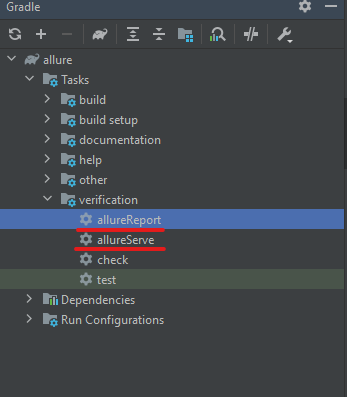
This will add "allureServe" and "allureReport" to your gradle verification tasks.
After building the project and downloading all the files from dependencies you can start implementing Allure to your project.
Maven
For Maven it is a pretty straightforward process as well. You are going to need to modify your pom.xml file:
<properties>
 <aspectj.version>{needed version}</aspectj.version>
 <allure.version>{needed version}</allure.version>

</properties>

<dependencies>
 <dependency>
 <groupId>io.qameta.allure</groupId>
 <artifactId>allure-junit4</artifactId>
 <version>${allure.version}</version>
 </dependency>
 <dependency>
 <groupId>io.qameta.allure</groupId>
 <artifactId>allure-rest-assured</artifactId>
 <version>${allure.version}</version>
 </dependency>
</dependencies>

<build>
 <plugins>
 <plugin>
 <groupId>org.apache.maven.plugins</groupId>
 <artifactId>maven-surefire-plugin</artifactId>
 <version>{needed version}</version>
 <configuration>
 <testFailureIgnore>false</testFailureIgnore>
 <argLine>

javaagent:"${settings.localRepository}/org/aspectj/aspectjweaver/${aspectj.version}/aspectjweaver-${aspectj.version}.jar"
 </argLine>
 <properties>
 <property>
 <name>listener</name>
 <value>io.qameta.allure.junit4.AllureJunit4</value>
 </property>
 </properties>
 <systemProperties>
 <property>
 <name>allure.results.directory</name>
 <value>${project.build.directory}/allure-results</value>
 </property>
 </systemProperties>
 </configuration>
 <dependencies>
 <dependency>
 <groupId>org.aspectj</groupId>
 <artifactId>aspectjweaver</artifactId>
 <version>${aspectj.version}</version>
 </dependency>
 </dependencies>

 </plugin>
 <plugin>
 <groupId>io.qameta.allure</groupId>
 <artifactId>allure-maven</artifactId>
 <version>{needed version}</version>
 <configuration>
 <reportVersion>{needed version}</reportVersion>
 </configuration>
 </plugin>
 </plugins>
</build>
Don't forget to replace {needed version} with the version you need.
This will also add all the necessary dependencies and plugins to your project, and after building the project Allure will be ready.
Setting up project
We'll begin with a small Selenium test that opens Google.com, enters text into the search field, clicks the search button, and verifies that the searched text is present on the results page. We'll explore both the Page Object Model (POM) approach and the non-POM approach.
Let's start with the POM approach, which is the preferred method for organizing UI automated testing frameworks. Additionally, we'll be able to showcase Allure annotations. We'll create two classes for this purpose: GooglePage and GoogleSearchPomTest. The GooglePage class will contain our elements with locators and the methods that deal with those elements. The GoogleSearchPomTest class will contain our test logic.
The project will be available in its entirety on GitHub repository. You can download it and explore how everything is done.
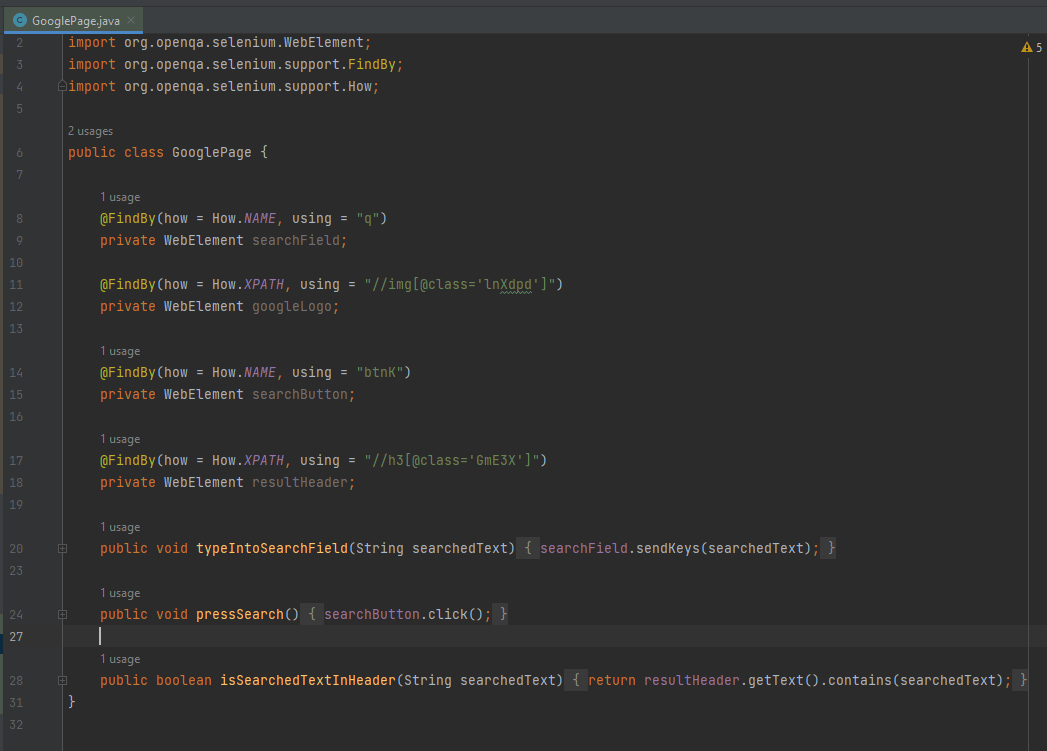
GooglePage class.
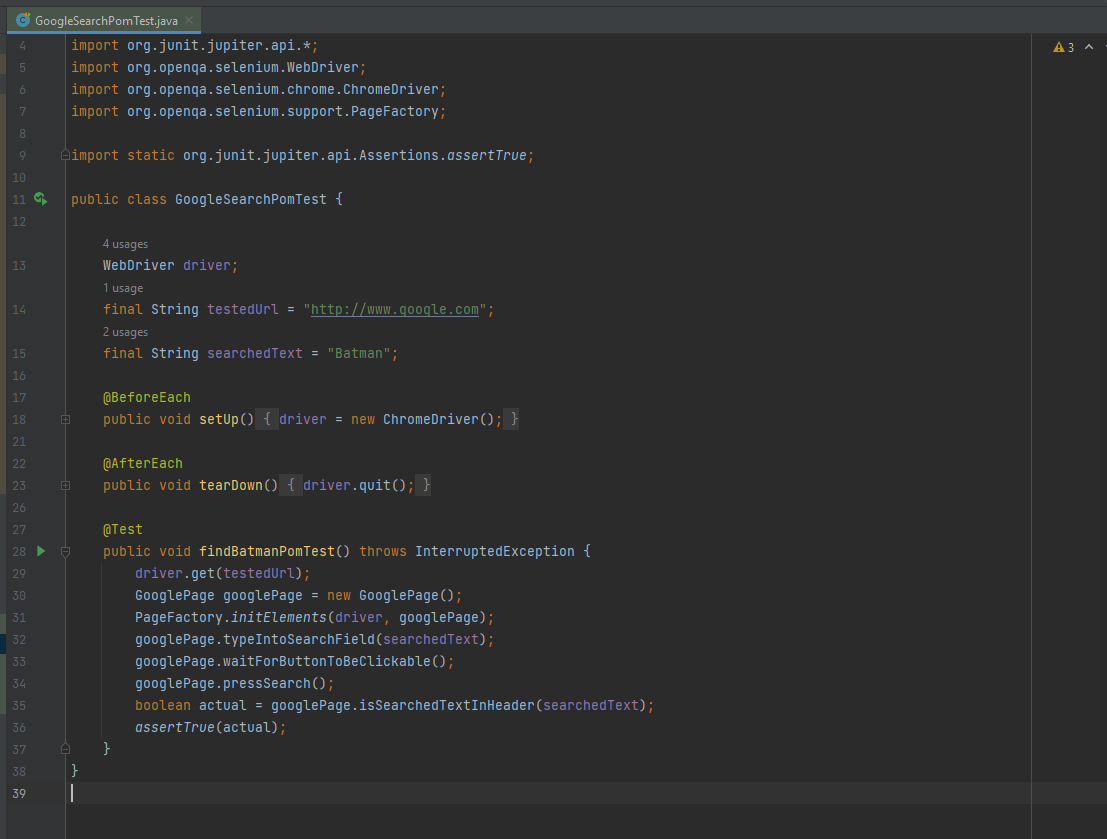
GoogleSearchPomTest class.
To keep things simple, I won't be creating a separate class for the search results page. Since we only need to interact with one element on the results page, I'll include it in the existing GooglePage class.
Generating report
Once everything is set up, we can generate the first Allure report by running our tests for the first time. This will create folders in the build directory of our project where the results of the test runs will be recorded. Allure can then use these results to generate a report. To generate an Allure report, run either "./gradlew allureServe" or select the "allureServe" option in your Gradle tasks.
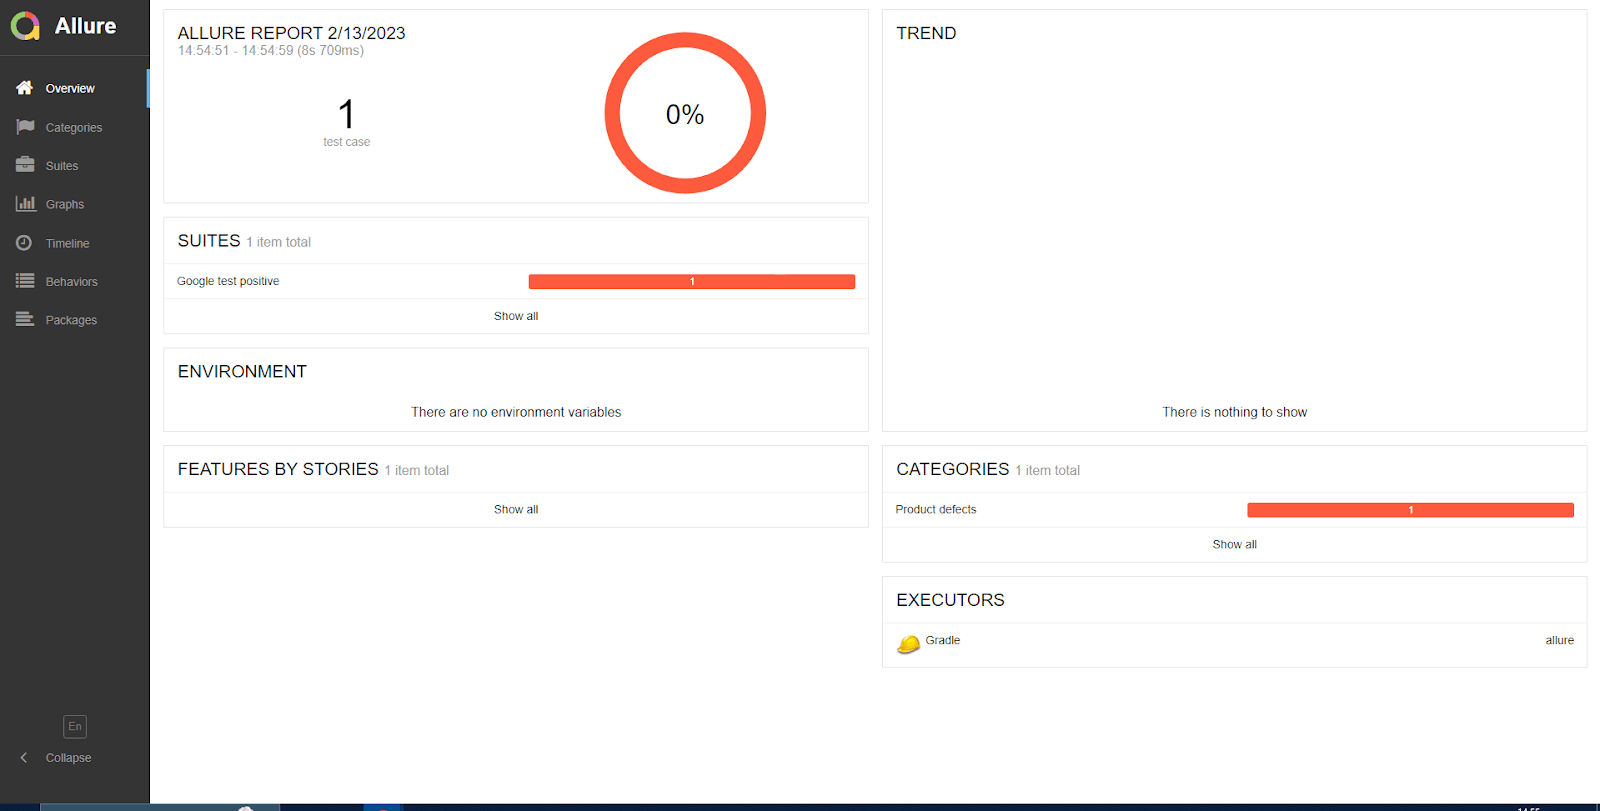
Running "allureServe" will launch the Allure web service on your local machine and open an HTML page in your browser. This page will provide an overview of the test run.
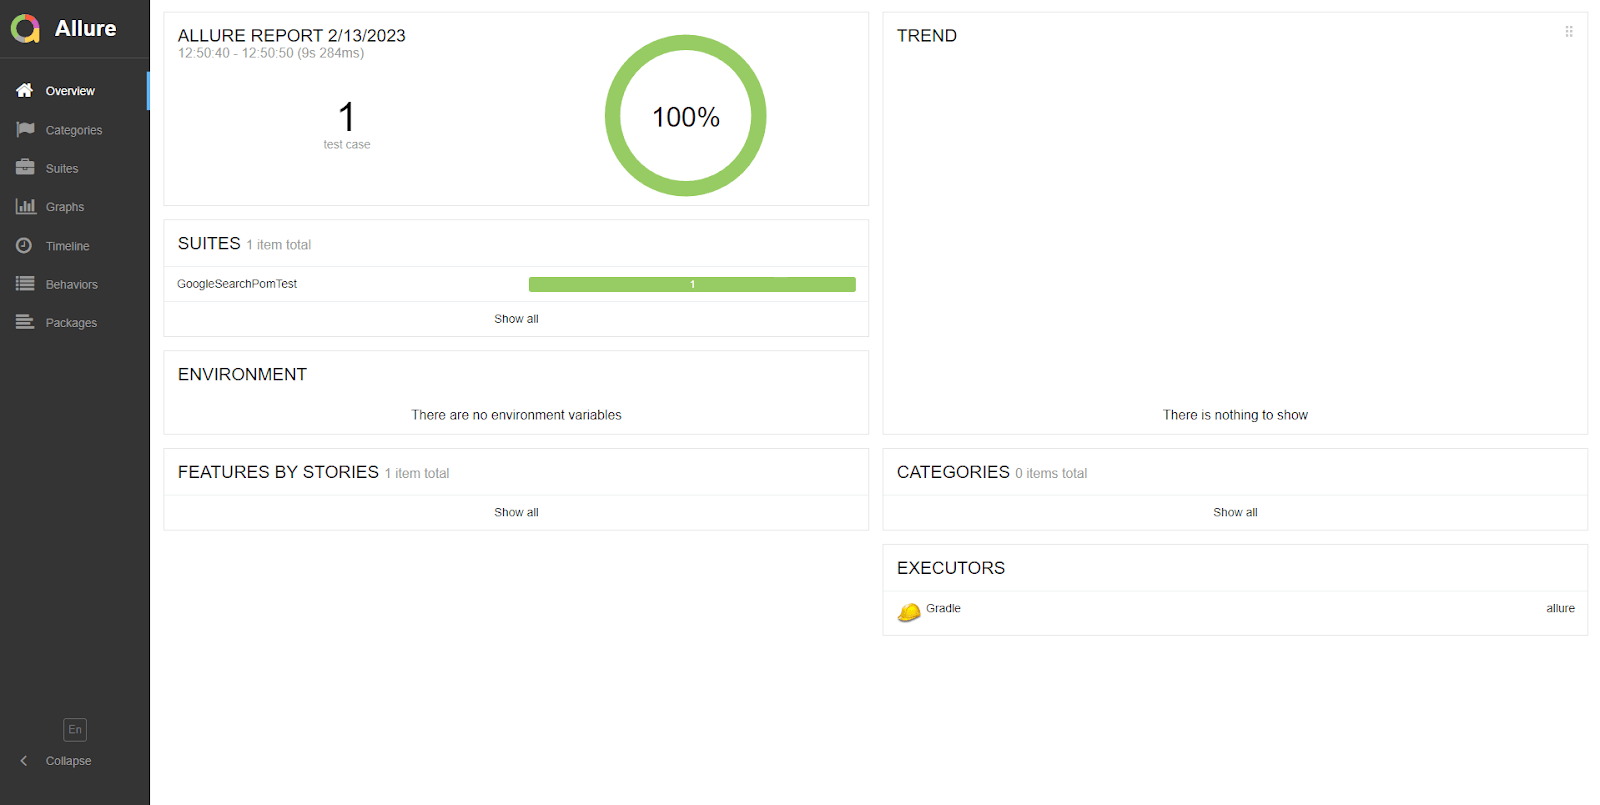
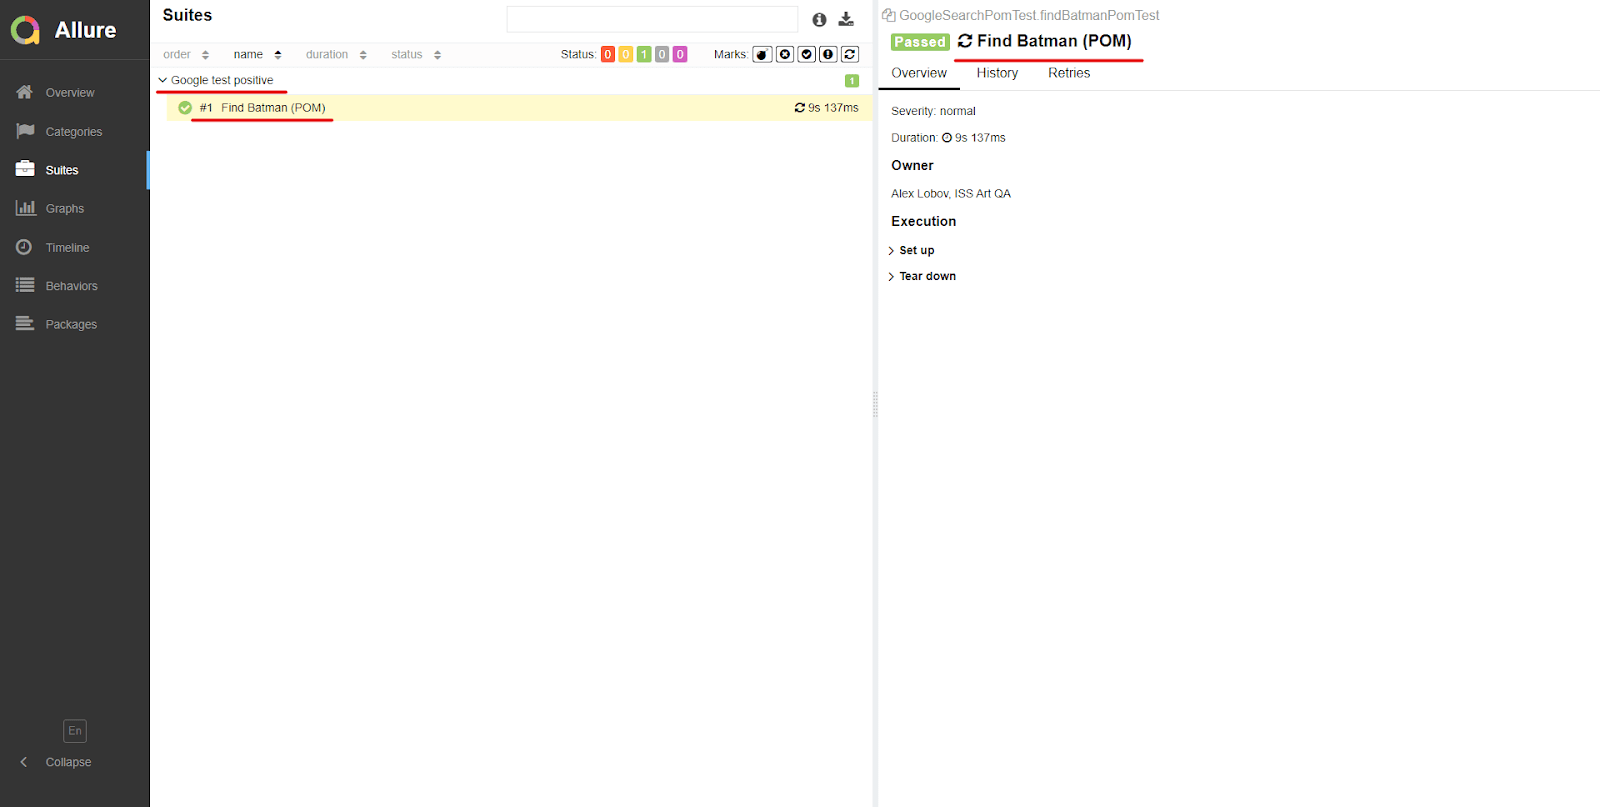
The overview page displays various elements showcasing the results of your test run. The most important of these is the "Suites" block, which shows the test classes that were run. Additionally, there's a graphical representation of the quantity of tests above it. Clicking on a suite will allow you to see which tests were included and the steps they contained.

In our example, there was only one test method. Allure automatically designates methods annotated with "@BeforeEach" and "@AfterEach" as "Set up" and "Tear down" steps, respectively. However, it doesn't display any steps within the test method itself.
Customizing report
One of the main features of Allure is its annotations, which allow users to customize the report to make it more readable. Currently, the report doesn't provide much information.
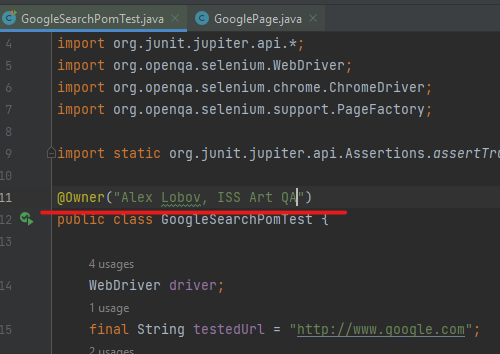
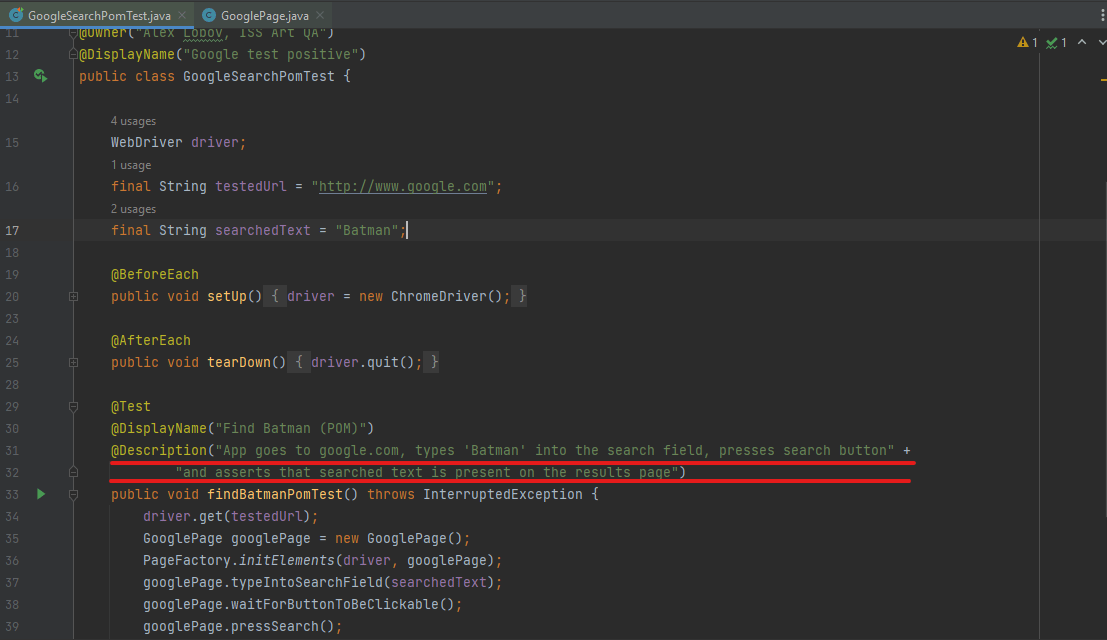
To improve it, we can start by using the "@Owner('Owner's name and position')" annotation. We can annotate test classes with this annotation to indicate the owner of the tests.
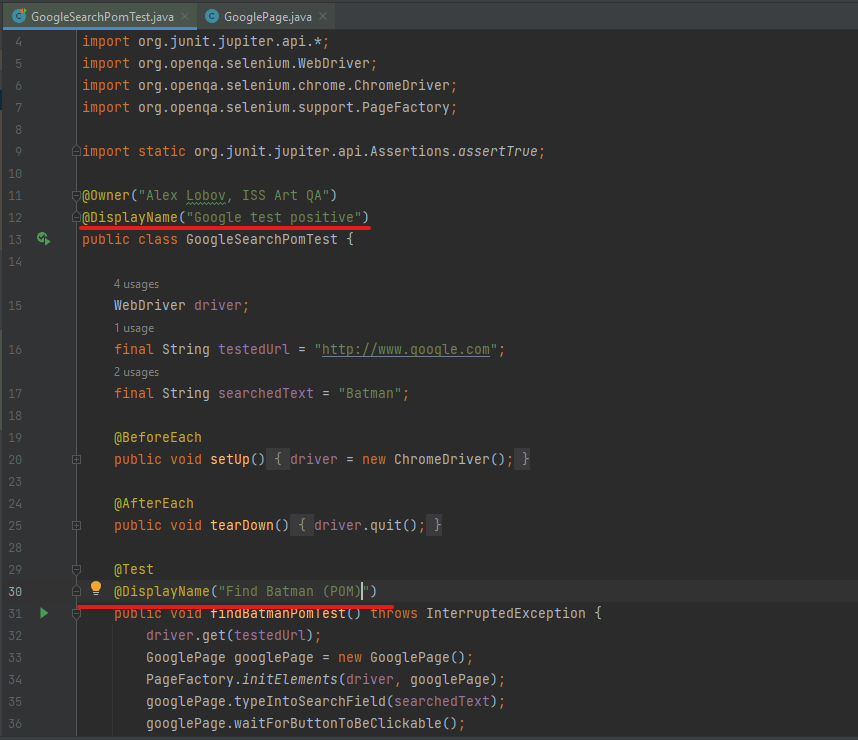
Next, we can improve the report even further by using the "@DisplayName('Test name')" annotation. We can add this annotation to each test class and test method to provide a clear, descriptive name for each suite and method in the report.
We need to generate the report one more time.
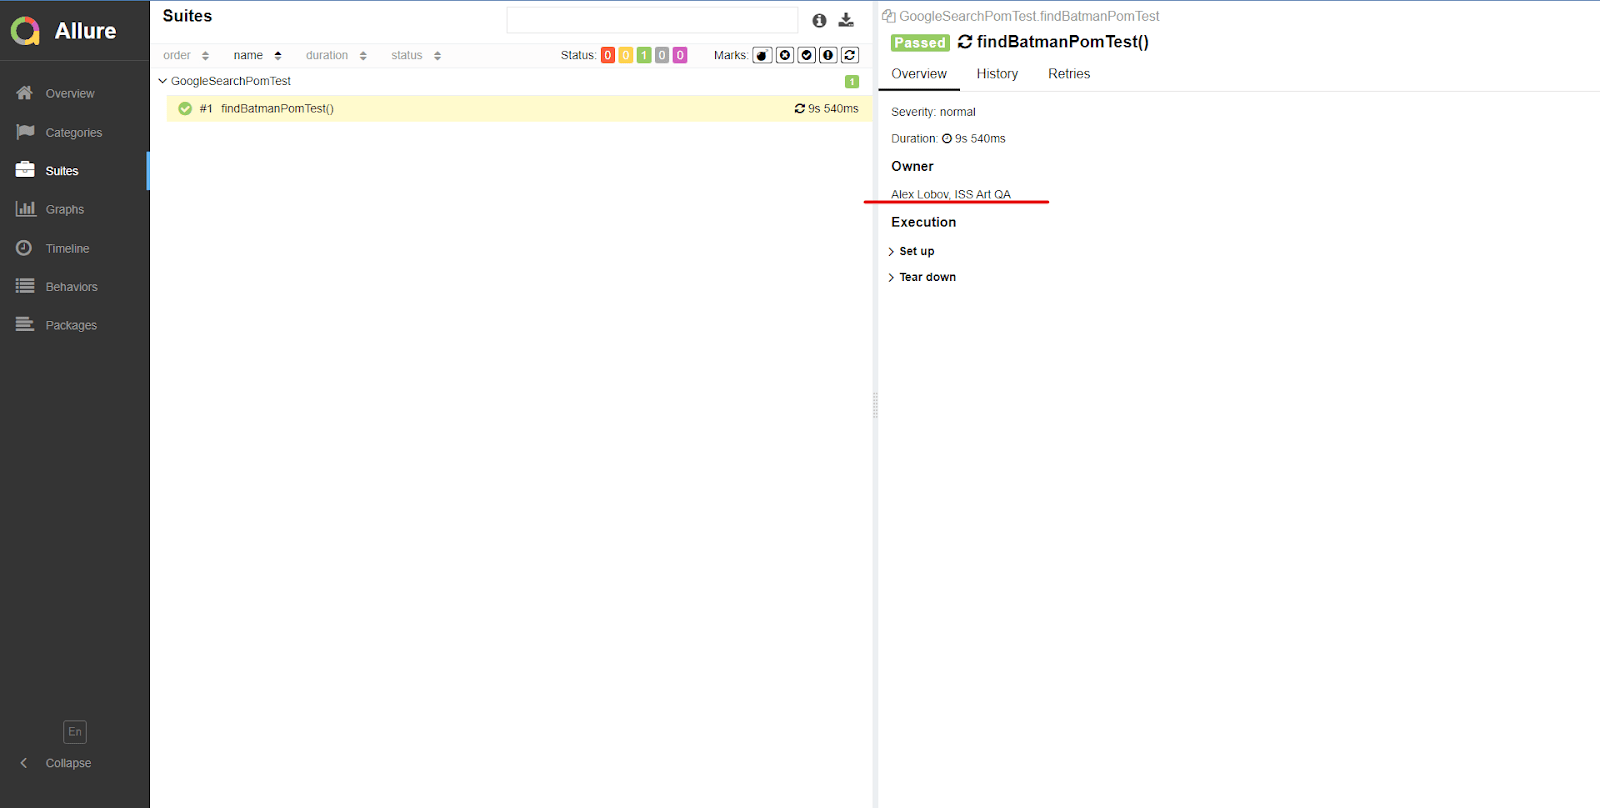
By adding the "@DisplayName" and "@Owner" annotations to our test classes and test methods, the report has become more readable for non-technical stakeholders such as managers.
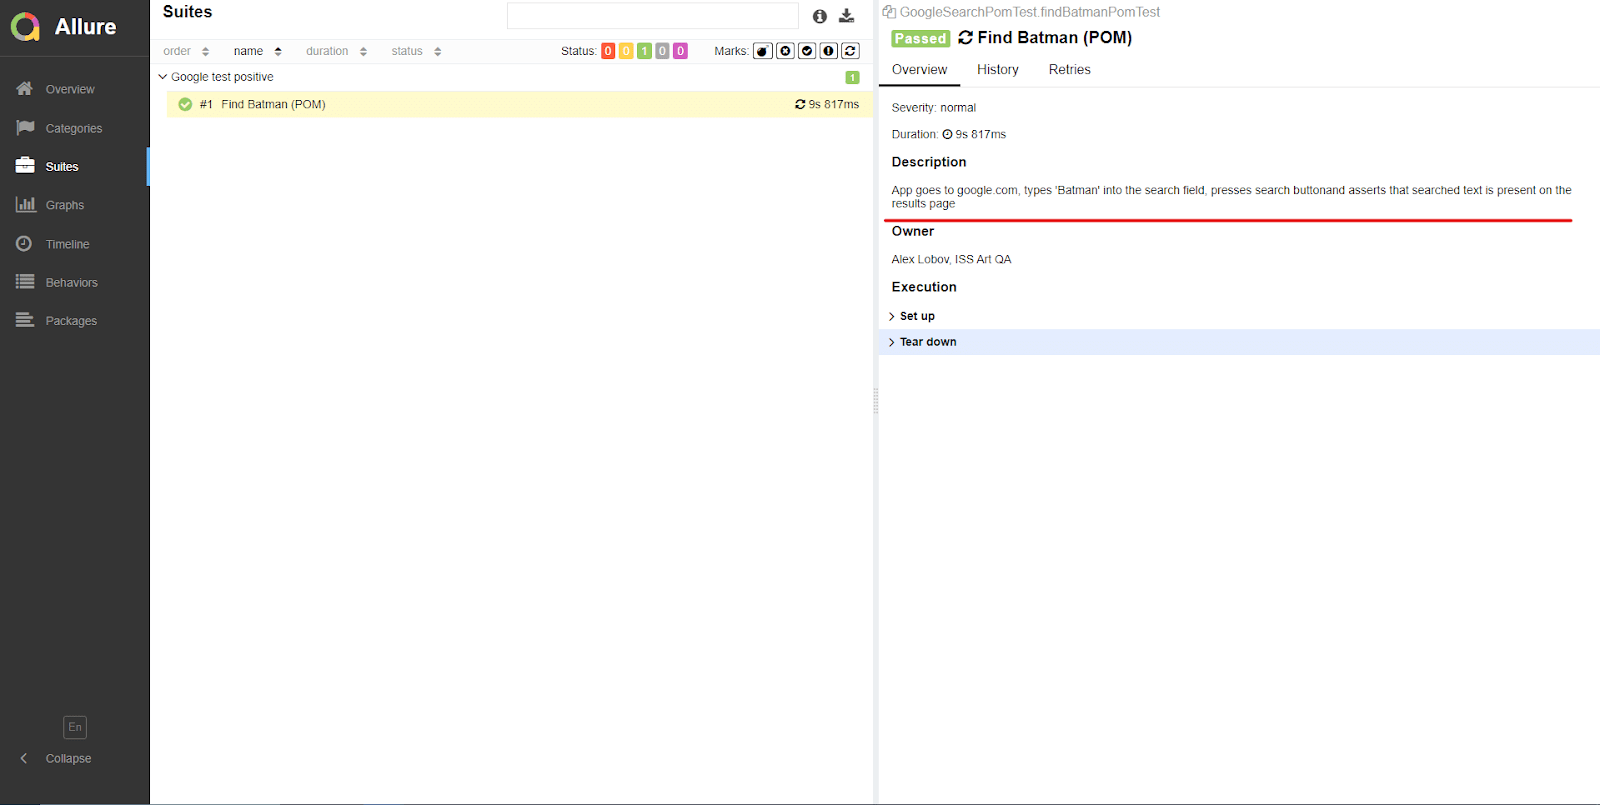
In some cases, it's important to provide a description of how a test works and what it does. We can use the "@Description('description')" annotation to achieve this. This annotation can be added to every test method in a suite, just like "@DisplayName".
This will show the description on the allures page of the test case.
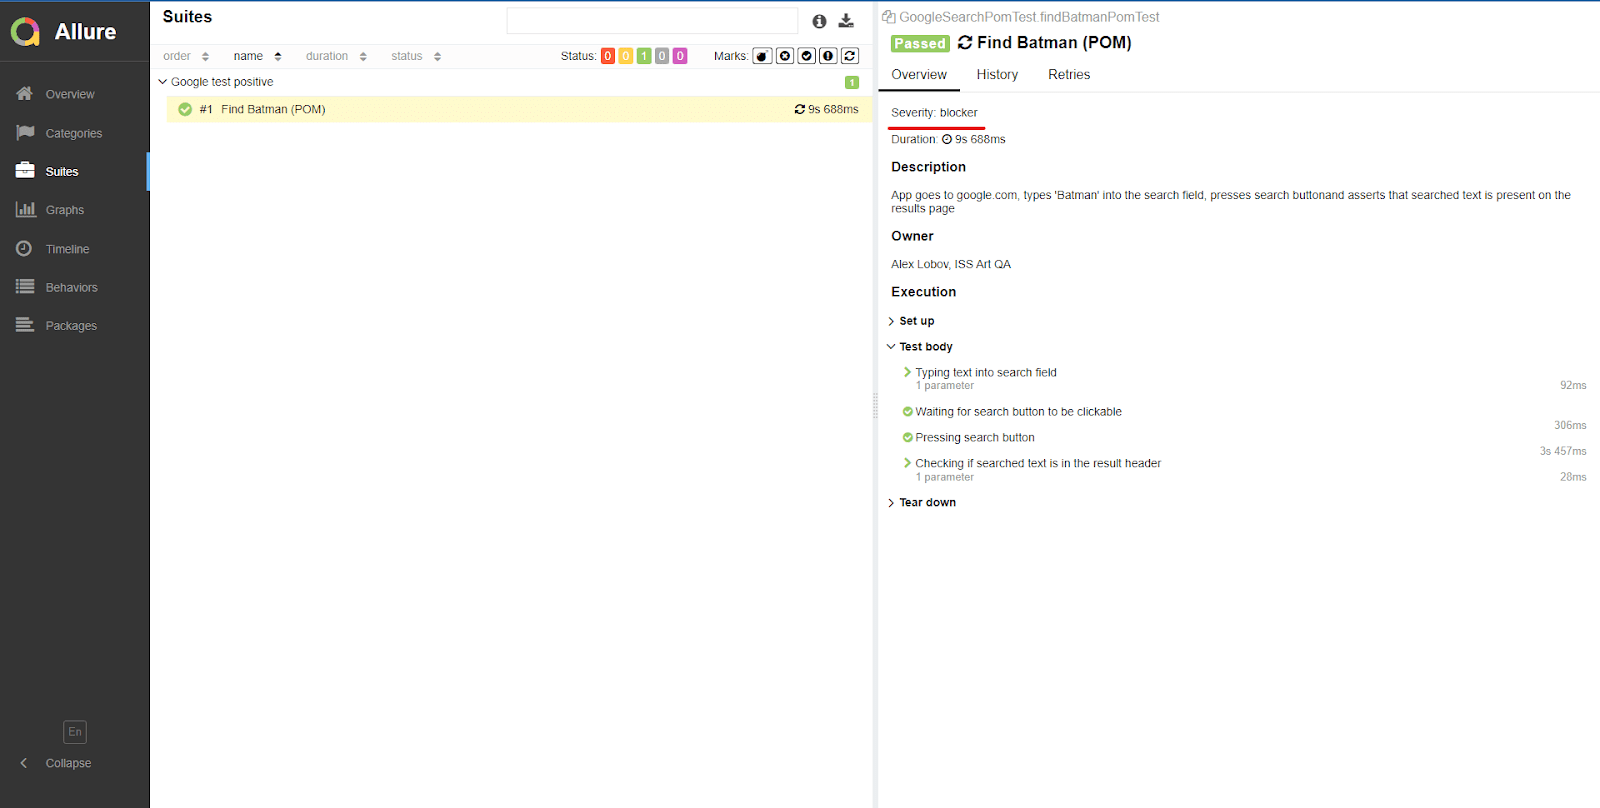
To make the Allure report even more informative, we can add the "@Step('step description')" annotation to each method in our page object. This allows any exceptions that occur during the test run to be displayed in the corresponding step.
To implement this, we can return to the GooglePage class and add the "@Step" annotation with a descriptive text to each method.
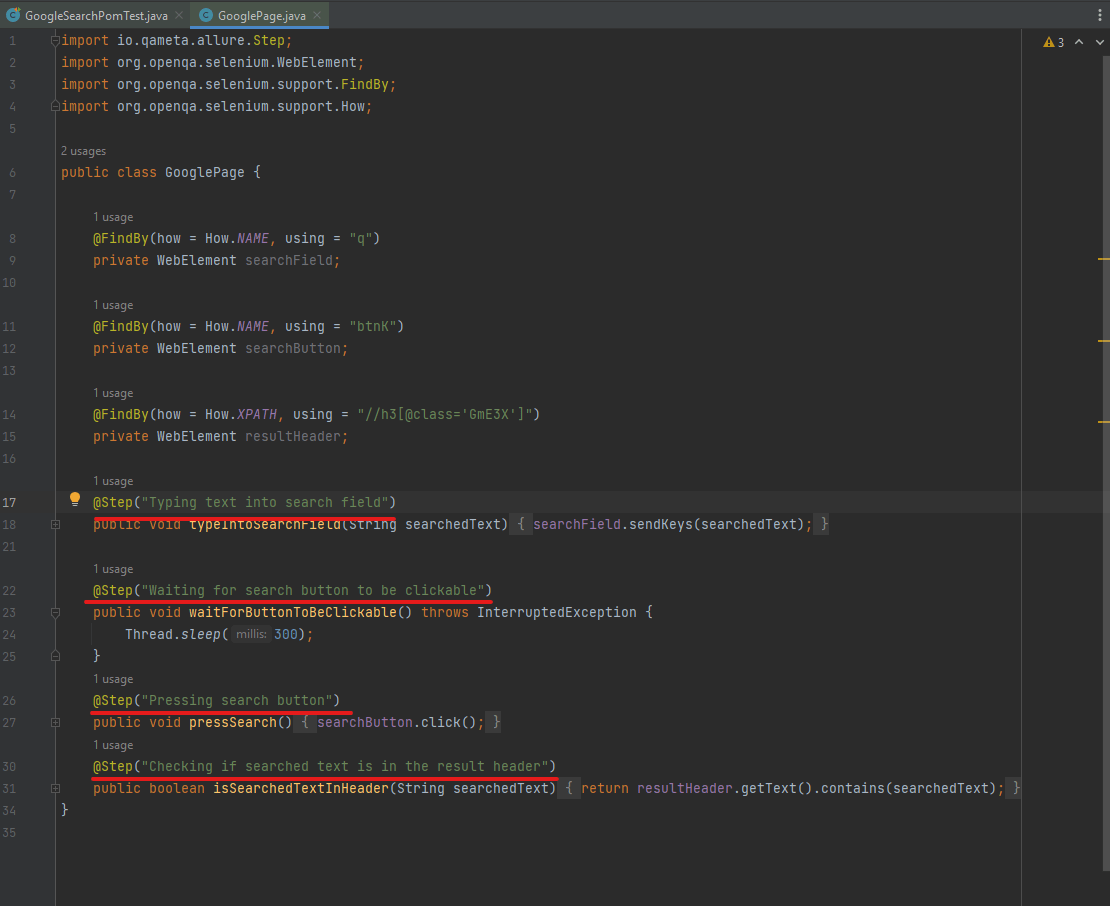
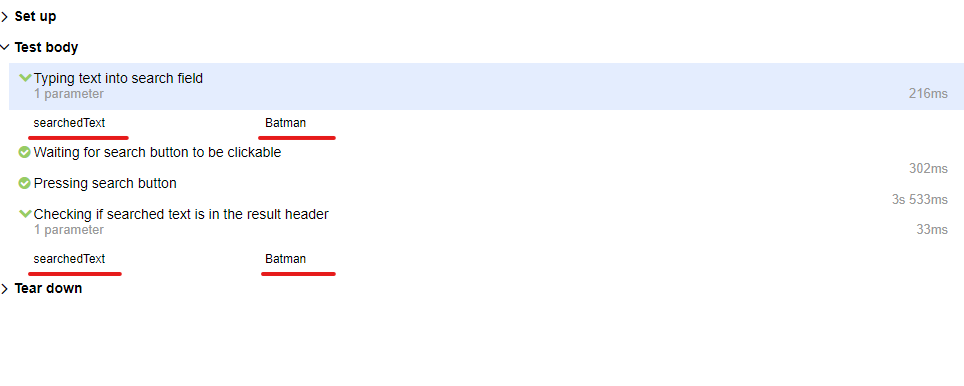
Now in the report we can see that our steps are displayed.
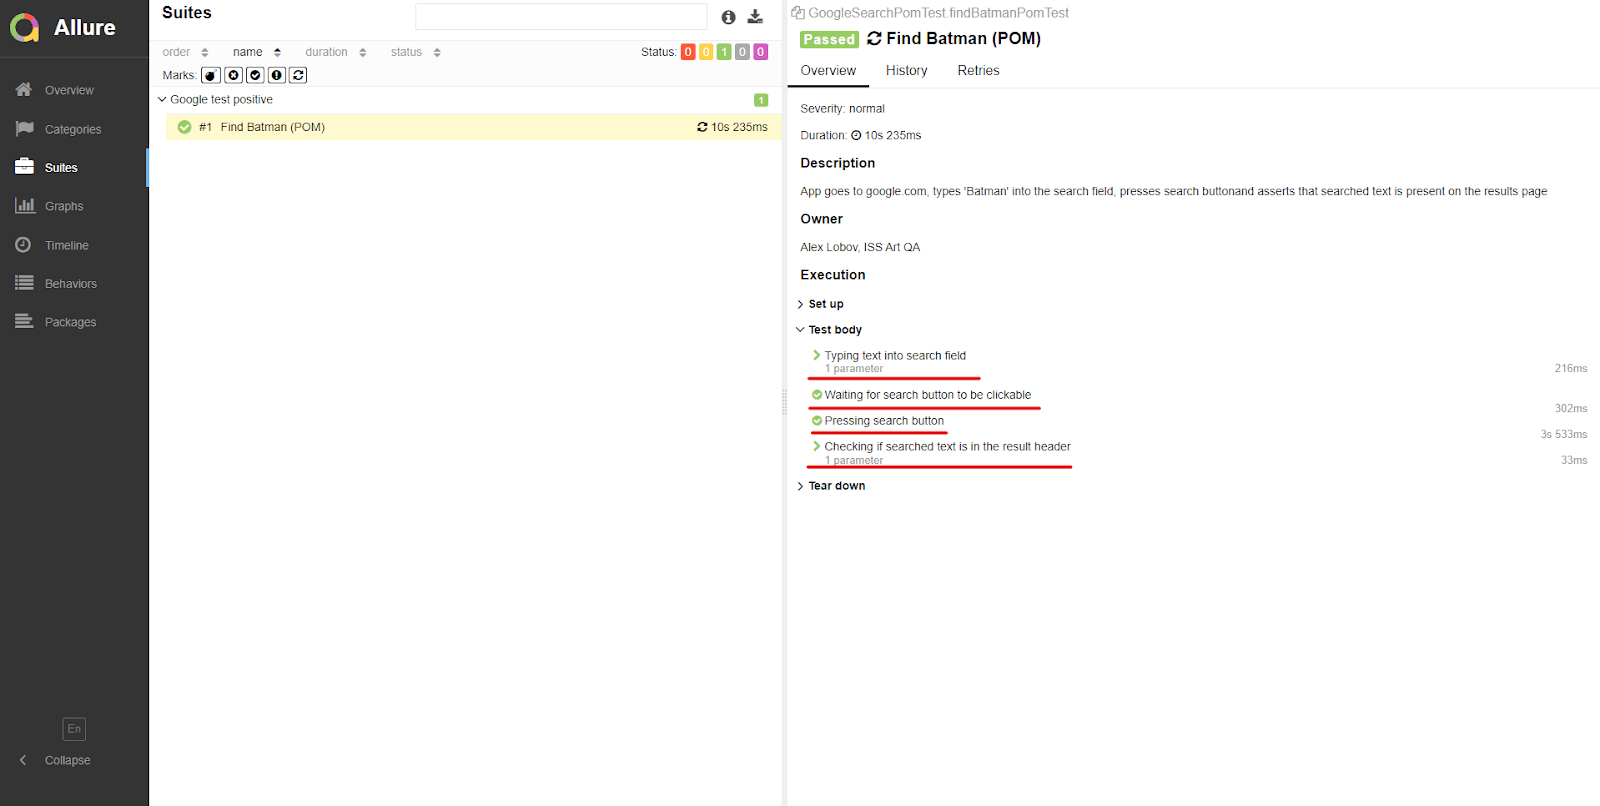
And if our step methods have any parameters they will be displayed as well.
Allure also provides the duration of each test method, which can help in optimizing test performance.
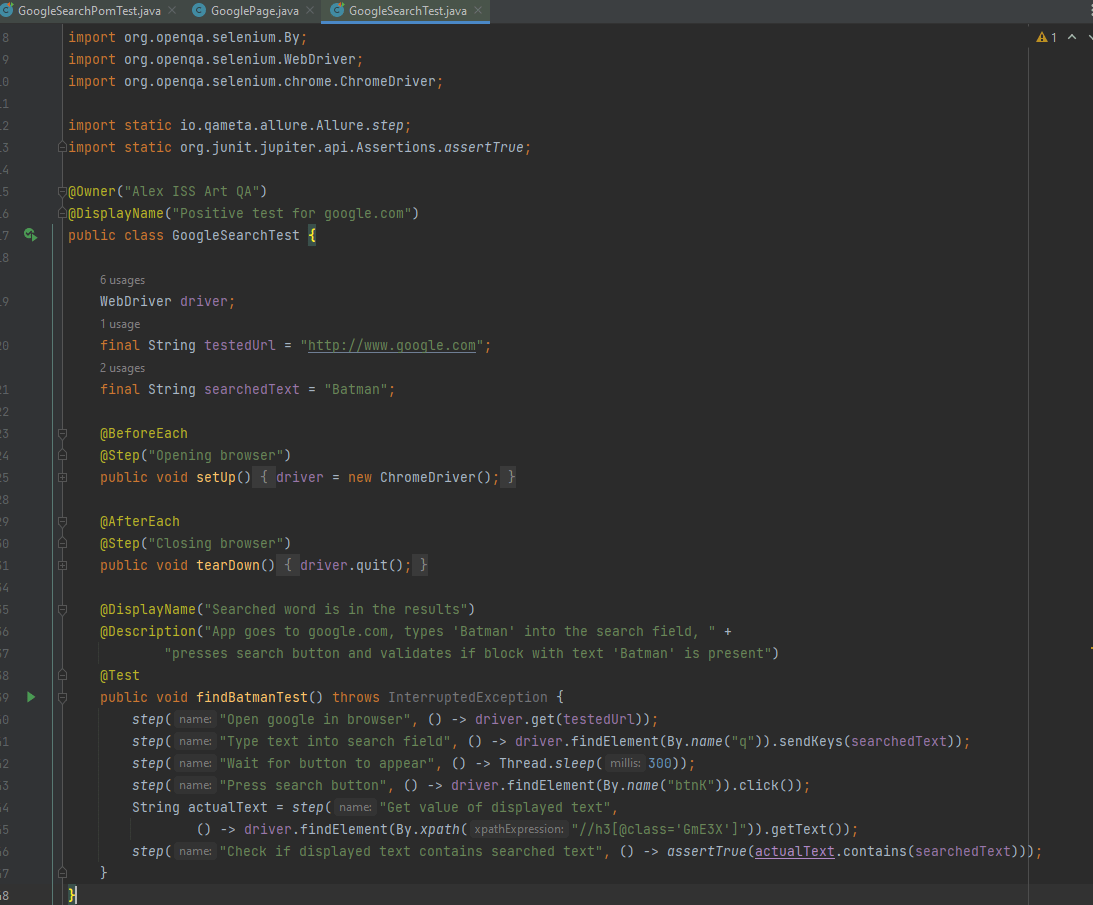
If you do not wish to use the page object model in your framework and want to interact with WebDriver directly, you can use the static method "step()" provided by Allure. This method allows you to define a step with a name and pass the interaction with the driver as a lambda through the ThrowableRunnableVoid (for interactions not returning any value) or ThrowableRunnable<T> (for interactions returning something) functional interfaces as parameters. The resulting steps will be included in the report, making it more informative.
Even with this little amount of customization our report already looks quite informative and easy to read and understand. Now we can add a level of severity to our tests. To add a level of severity to our tests, we can use the @Severity() annotation, which allows us to specify the level of severity for each test. The severity level can be chosen from the SeverityLevel enum.
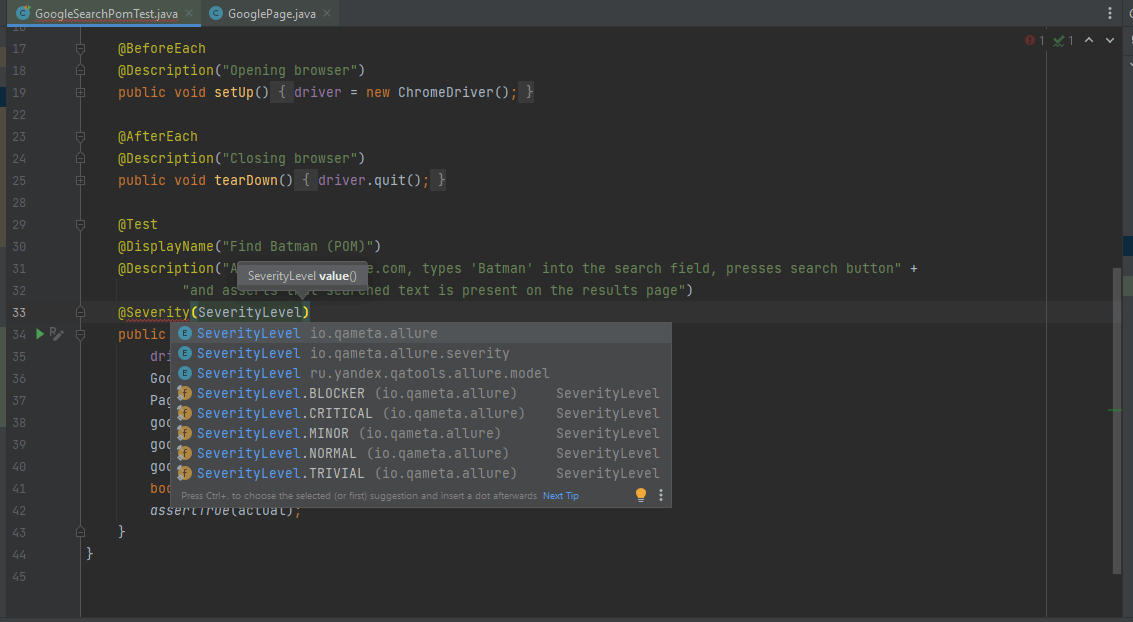
This will change the severity level in the report. Note that by default severity level is set to "Normal".
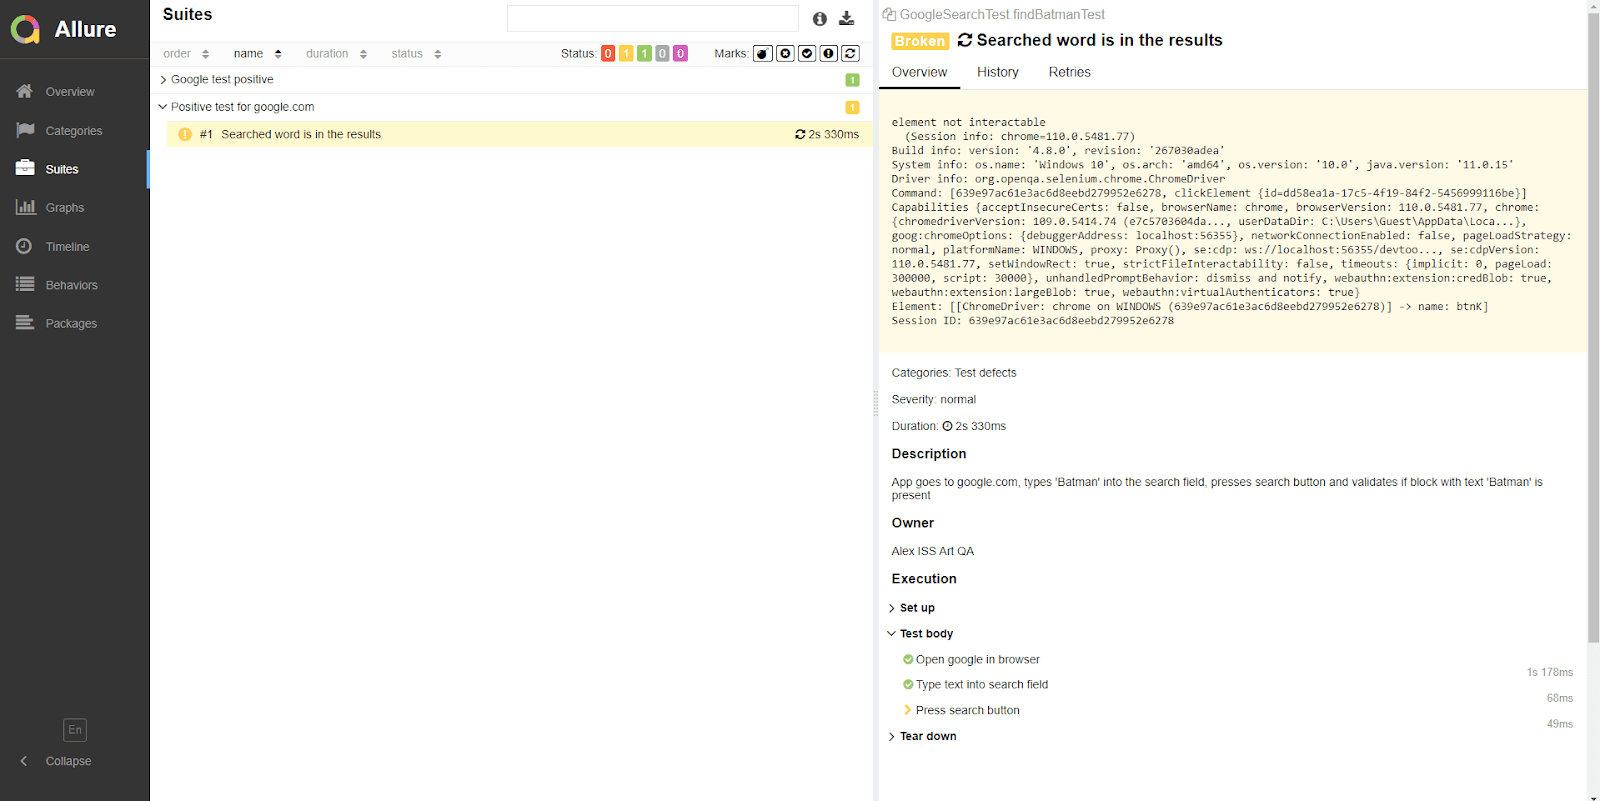
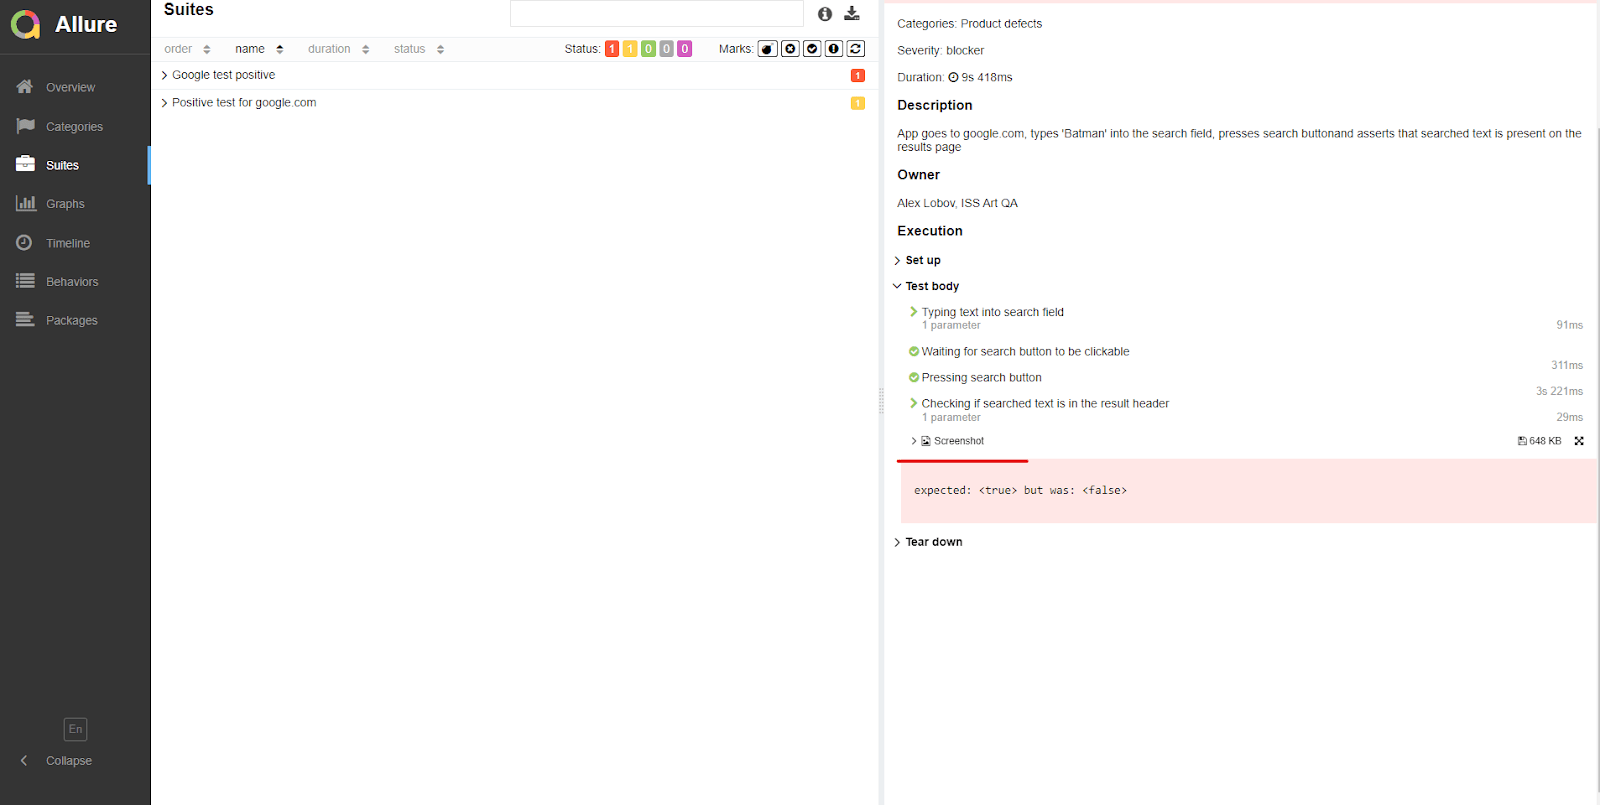
Now let's see what a failed test is going to look like. Let's change our isSearchedTextInHeader method to expect false instead of true.

The Allure report displays the number of failed tests in our suite, identifies the step where an exception occurred, and presents a relevant part of the stack trace. Furthermore, Allure distinguishes between failed and broken tests. We implemented a code block that includes a 300-millisecond wait for the search button to become clickable in both tests. If we comment out this step in one of the tests, the driver may be too quick to click the button, resulting in an "element not interactable" exception. Allure recognizes this type of error and marks the test as broken, indicating that it's most likely a test engineering mistake rather than a bug.
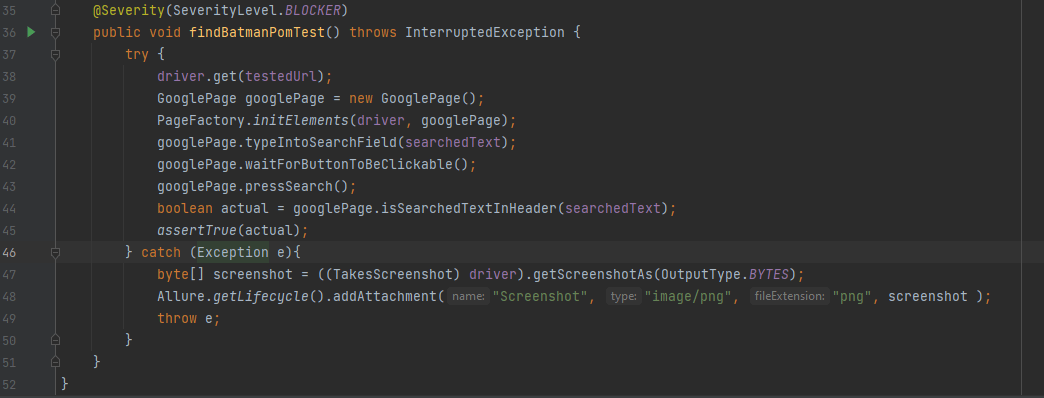
When we encounter failed tests in our test runs, we often want to investigate the specific cause of the failure. One effective way to do this is to attach a screenshot of the moment the test failed. JUnit offers the TestWatcher interface, while TestNG provides the ITestListener interface, both of which allow developers to override the testFailed() and onTestFailure() methods. In these methods, a screenshot attachment can be made by adding the appropriate code. Here's an example:
byte[] screenshot = ((TakesScreenshot) driver).getScreenshotAs(OutputType.BYTES);
Allure.getLifecycle().addAttachment("Screenshot", "image/png", "png", screenshot );
Allure.getLifeCycle().addAttachment() accepts an array of bytes as one of the parameters.
And Selenium is able to take screenshots as an array of bytes, as shown in the snippet above. This way every time the test fails, a screenshot will be captured and attached to your report.
But chances are this solution is going to conflict with your @AfterEach methods, since they are run first. I managed to find an easier but less elegant solution to avoid such a situation in this particular project. In order to avoid conflicts with the @AfterEach methods, I implemented a try/catch block around the entire test code. If an exception is thrown, the catch block takes a screenshot, attaches it to the report, and rethrows the exception.
Of course If you have hundreds of tests, implementation of testing framework interfaces is going to benefit you a lot more. However, to understand the general idea of how to capture and attach screenshots to the test report, the above example is sufficient.
Now whenever an exception occurs during test method execution, a screenshot will be captured and added to the report.
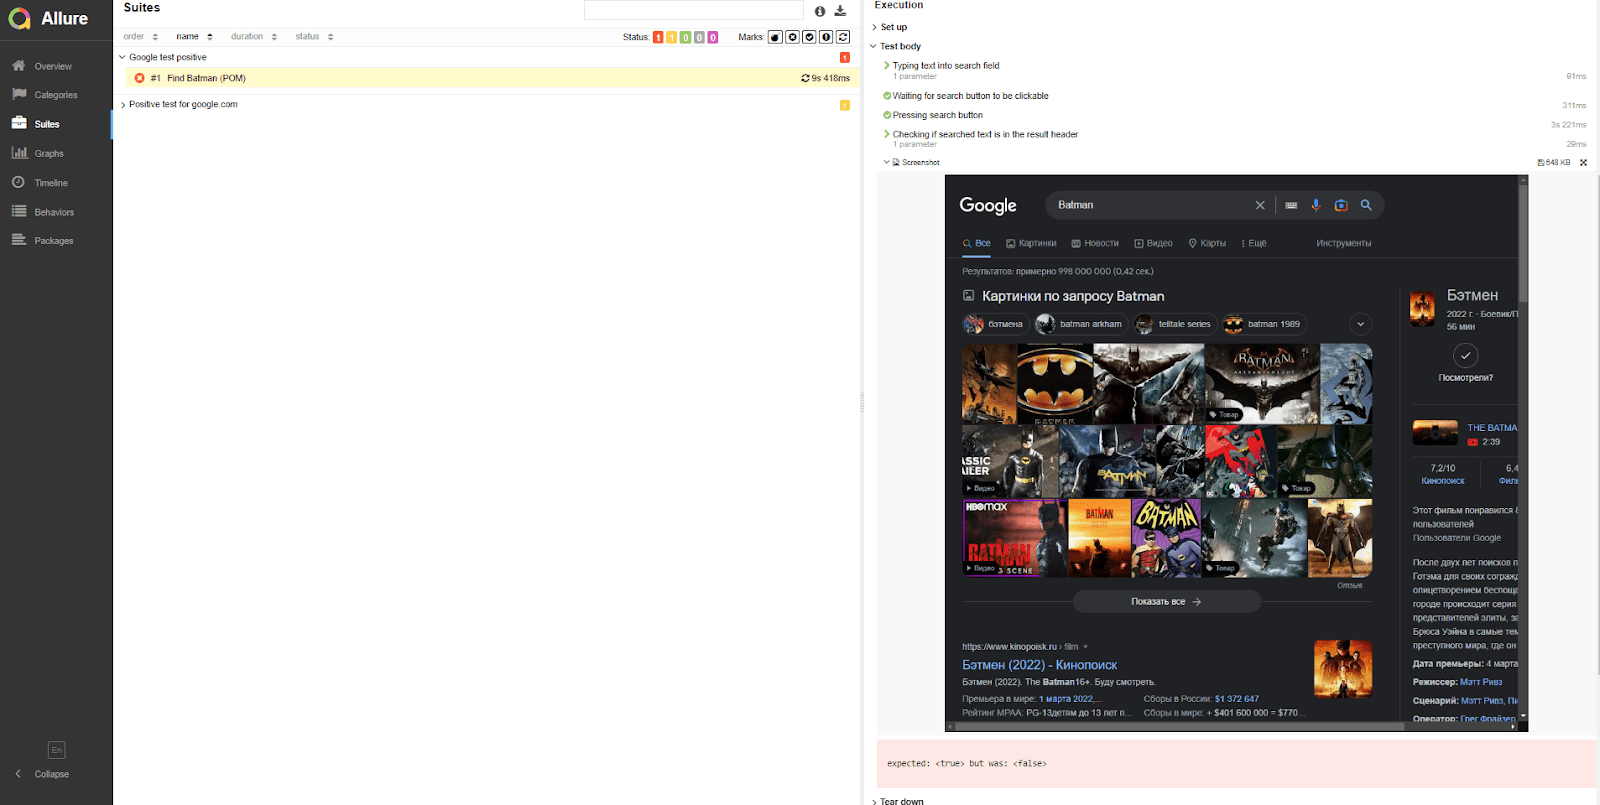
This approach provides a clearer understanding of any issues that occurred during the test execution, allowing you, your manager, or any other concerned party to identify what went wrong.
Conclusion
The capabilities of Allure extend far beyond what has been covered in this article. There are numerous other interesting and useful implementations of Allure in cooperation with CI/CD process, project and test management systems. By implementing the simple hints discussed here, you will be able to set up and customize your Allure report to a great extent, thereby making it a valuable and informative tool for you and your team. With the aid of Allure, you can get a better understanding of your test results and make data-driven decisions that enhance the overall quality of your software project.